Part 2: Printing the Shell
In part 1, I laid out the plan for this project. Since then, the printer has been running. This post covers the first real milestone: a printed helmet shell.
The Model Link to heading
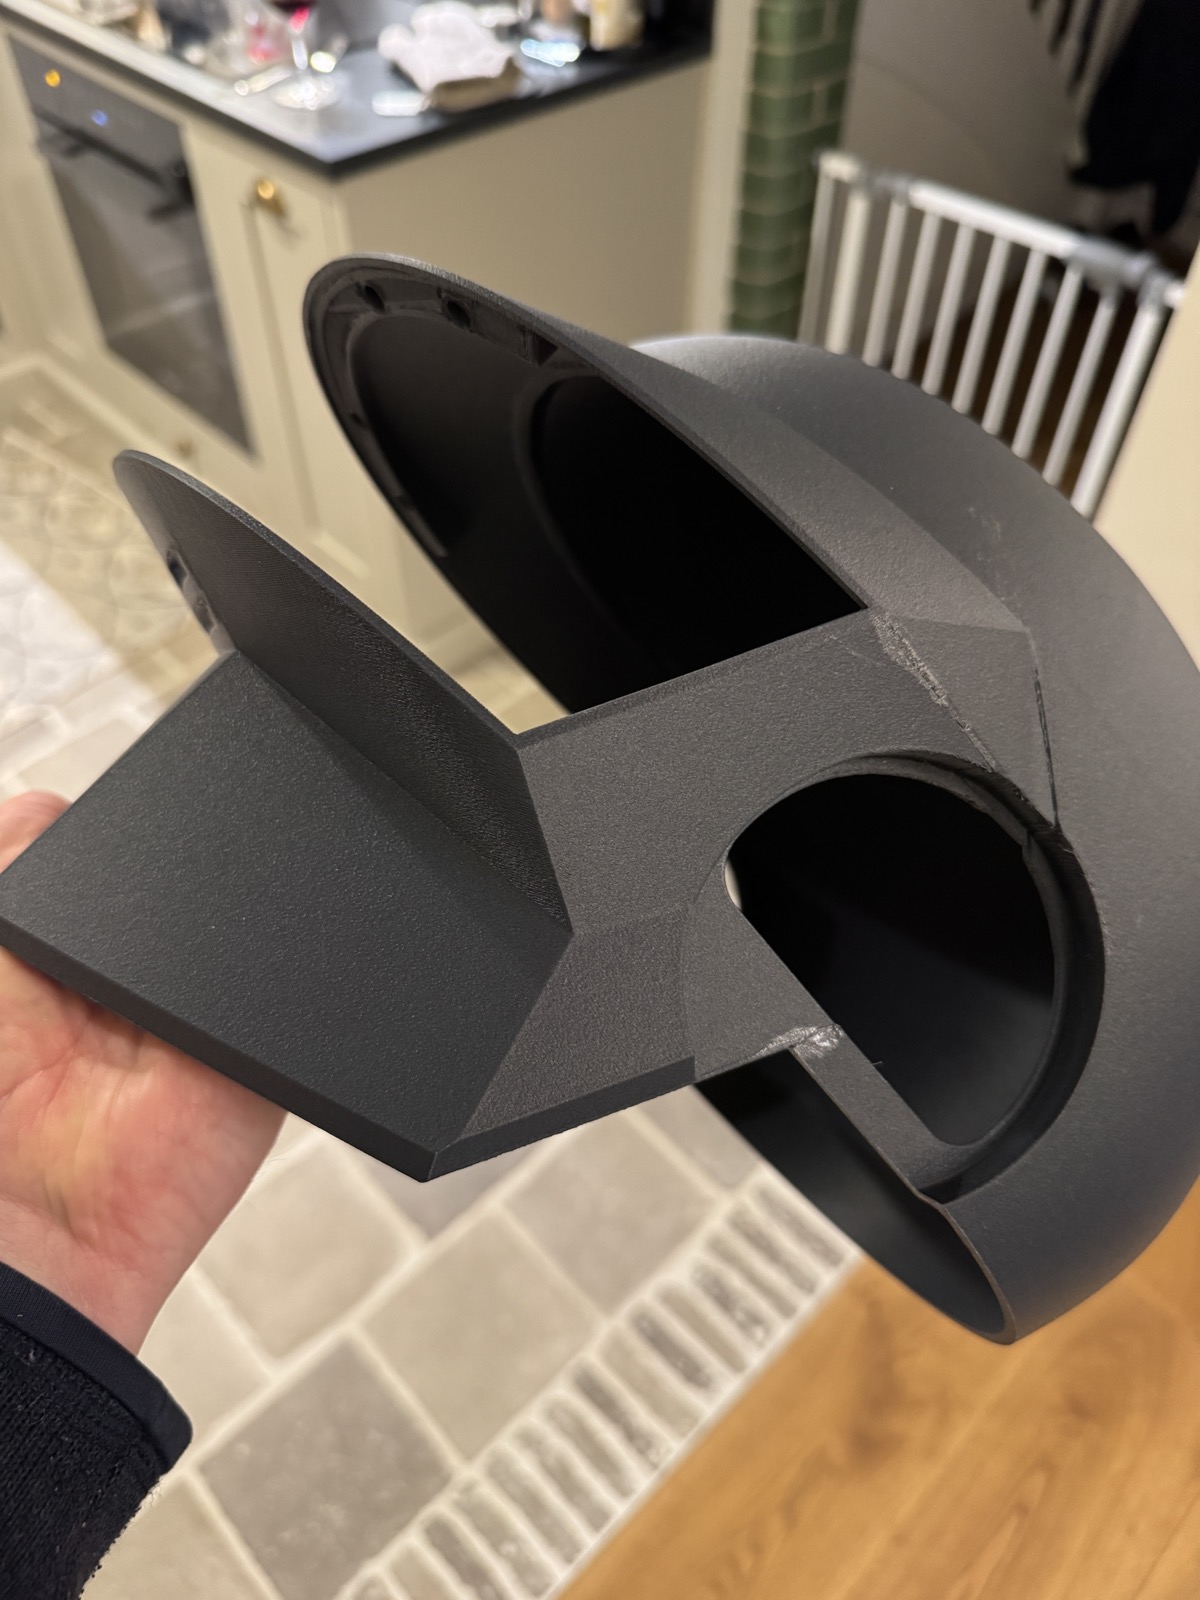
I covered model selection in the last post. I landed on this one from Thingiverse — good detail, clean geometry, and workable topology. The first order of business was getting it into Fusion 360 to scale it to wearable dimensions and cut it into chunks that would actually fit on the build plate.
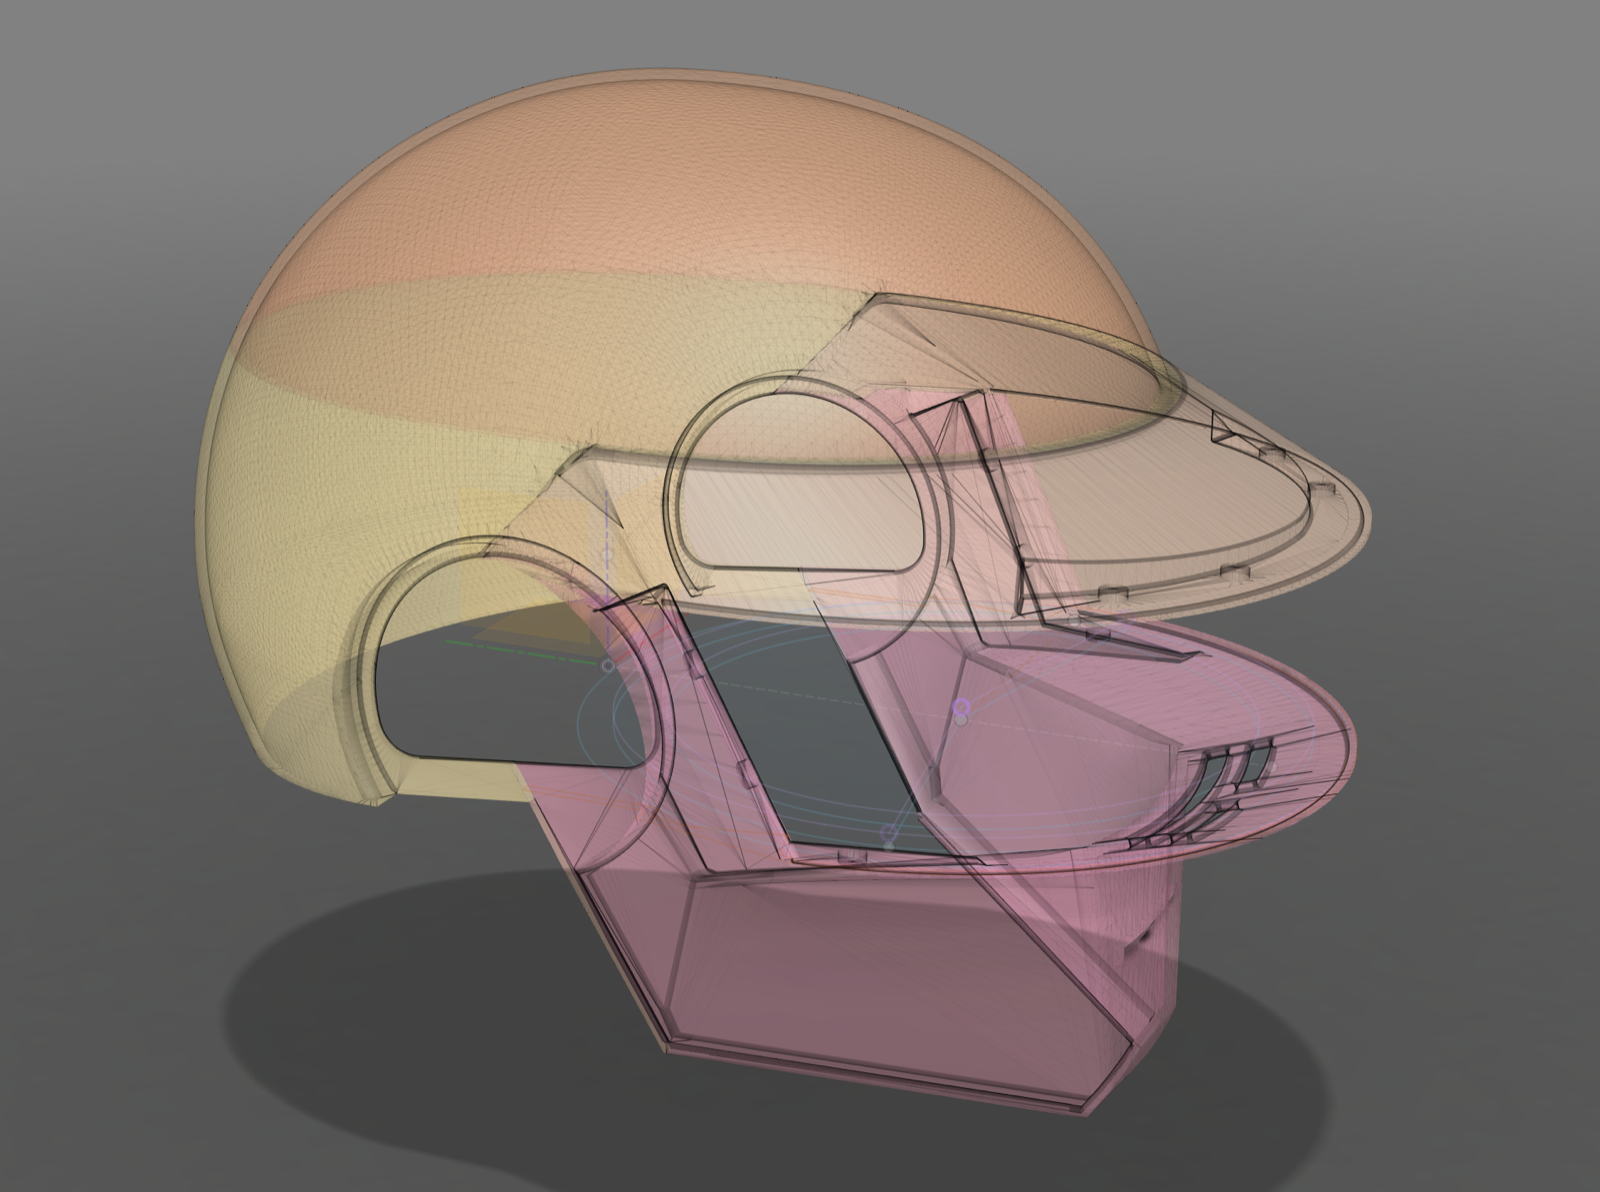
Sectioning a helmet into printable pieces sounds simple until you’re actually doing it. There’s a balance between minimizing the number of pieces (fewer seams to deal with later) and keeping each piece small enough to print without supports becoming a nightmare. The Fusion 360 color coding below shows roughly how I ended up slicing it.
Material Link to heading
For the shell, I went with ASA CF08 from Polymaker. A few things made this an easy choice.
ASA is UV-resistant and reasonably stiff, which matters for something that’s going to spend time on my workbench getting sanded, and on my head during use. But the real reason I picked it its soluablility in acetone. This means bonding the printed sections together is just a matter of applying acetone at the seam and letting it fuse. No glue or epoxy to worry about — the material itself becomes the bond. For a project where I need the shell to feel like one solid piece, that’s a huge advantage.
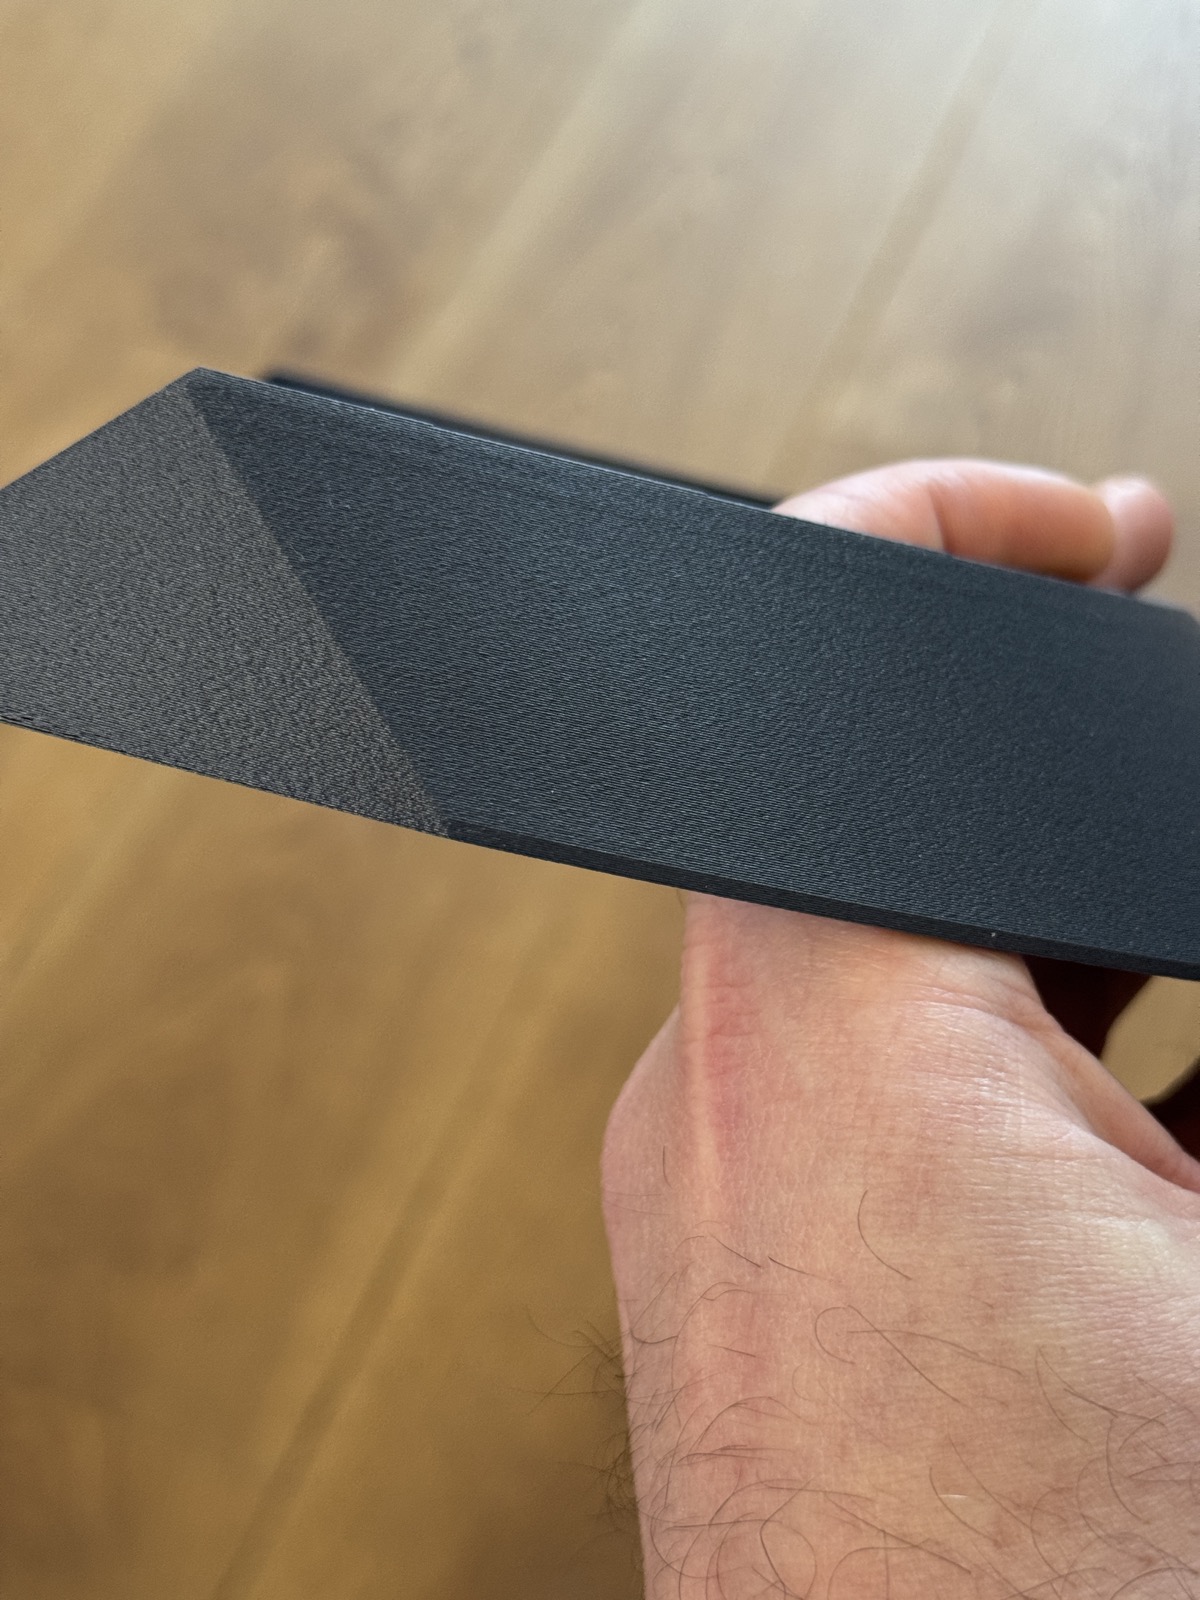
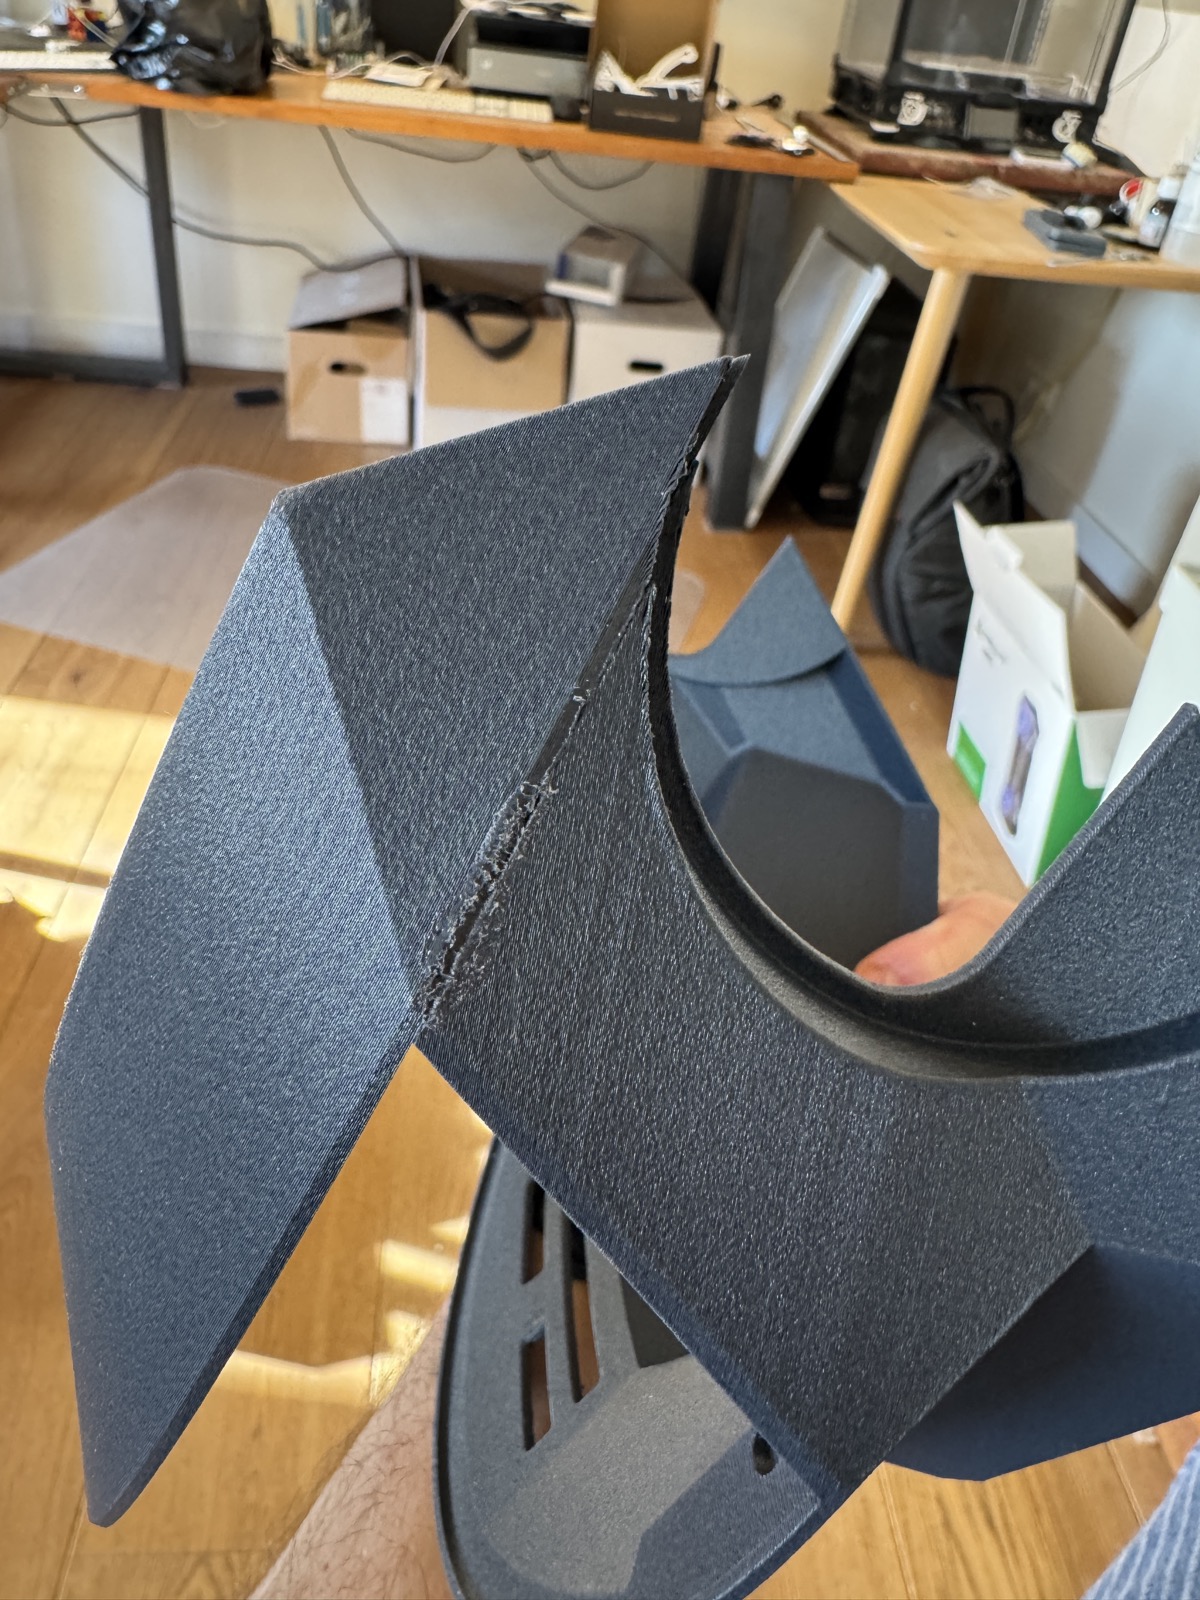
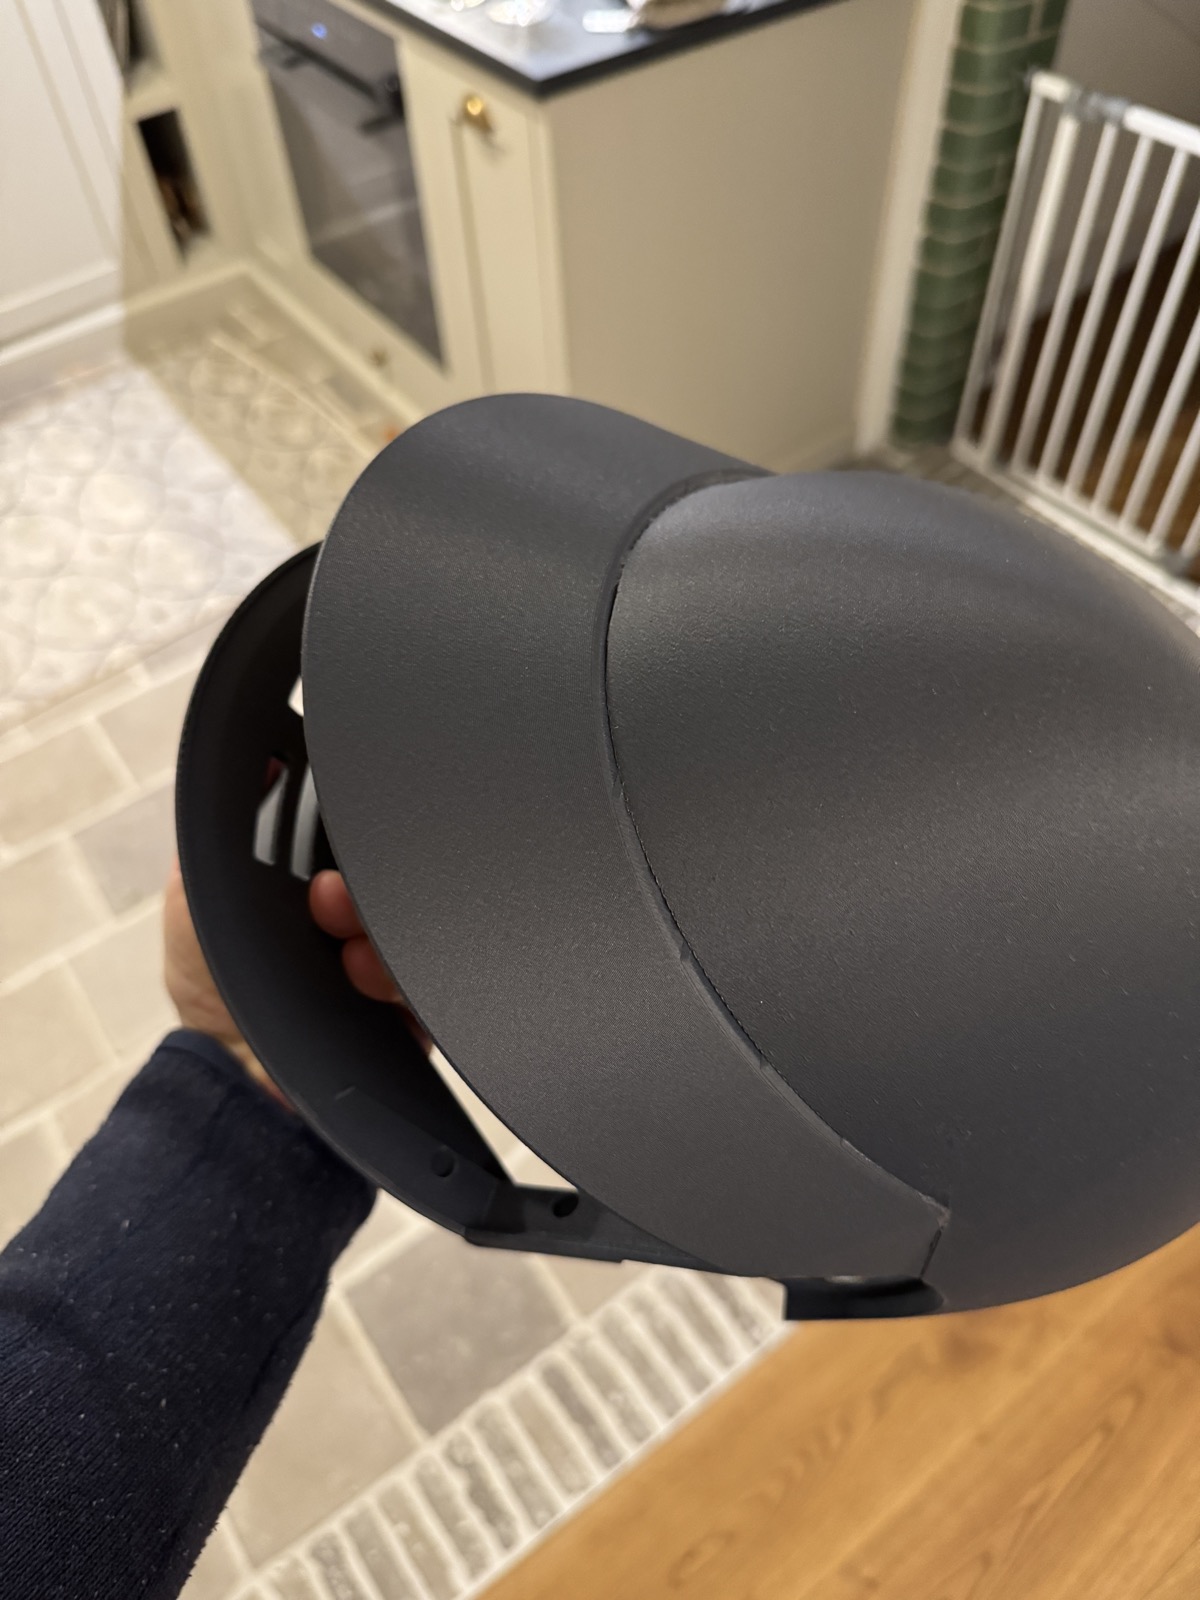
The material printed well. Bed adhesion was pretty consistent (with a preheated chamber and appropriate brim / glue stick preparations), layer adhesion was excellent, and I didn’t have the warping issues that make large ASA prints frustrating. The carbon fiber fill gives the surface a slightly matte, textured look straight off the printer — you can see it clearly here. I kind of like how it looks, and I’ll be sad to sand it smooth during postprocessing.
Bonding It Together Link to heading
With everything printed, the next step was joining the sections. The process is straightforward: apply acetone along the seam, hold the pieces together, and let it cure. I used masking tape to hold things in alignment while the acetone flashed off.
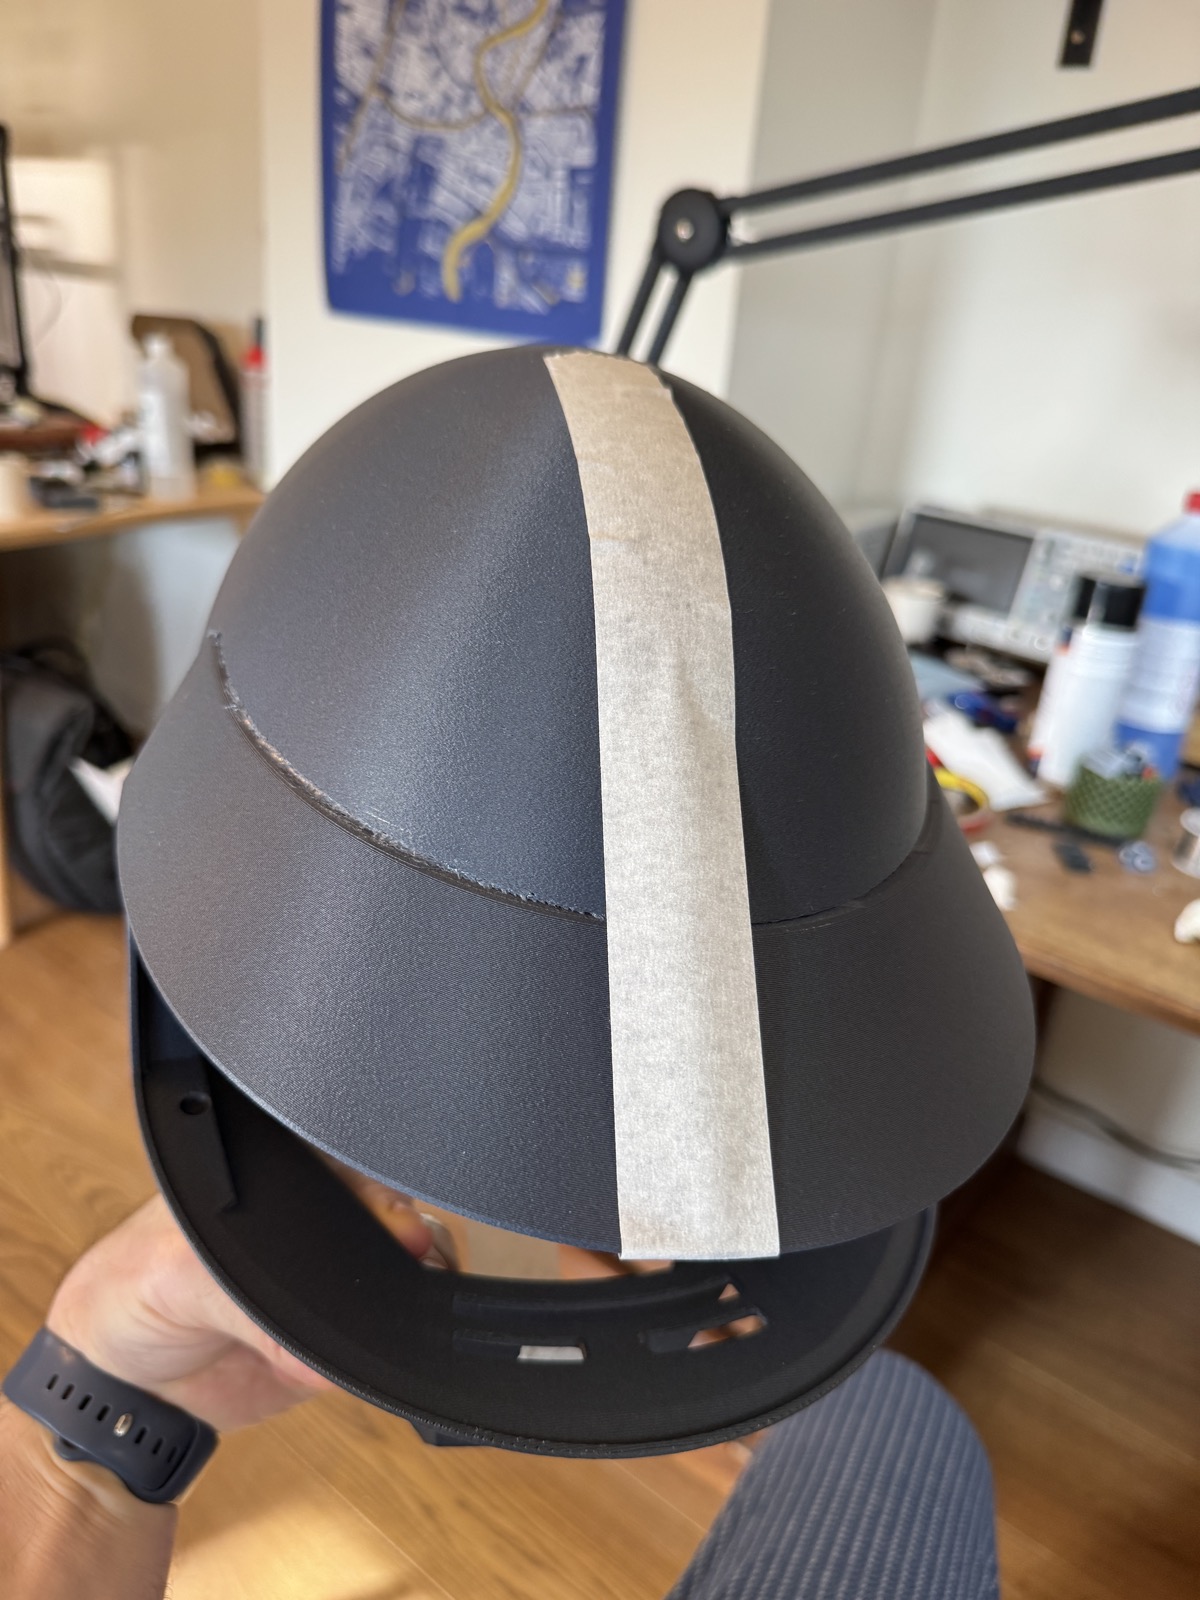
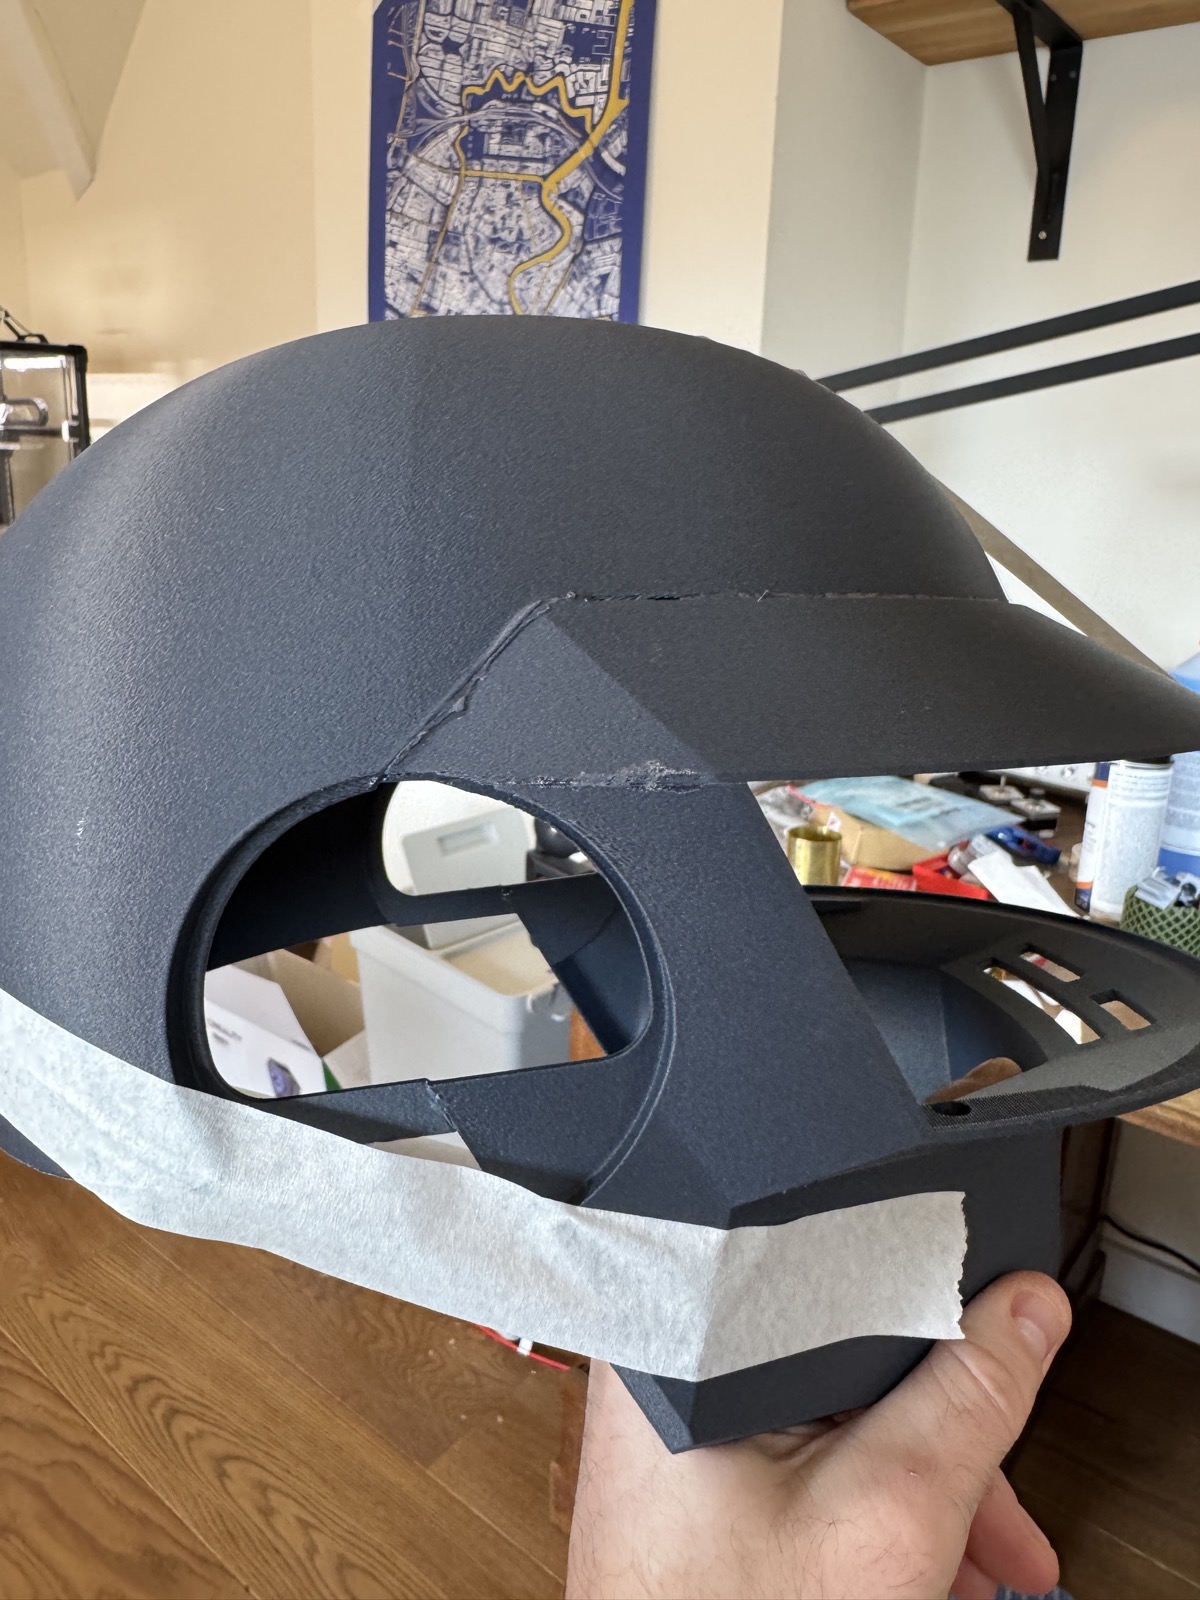
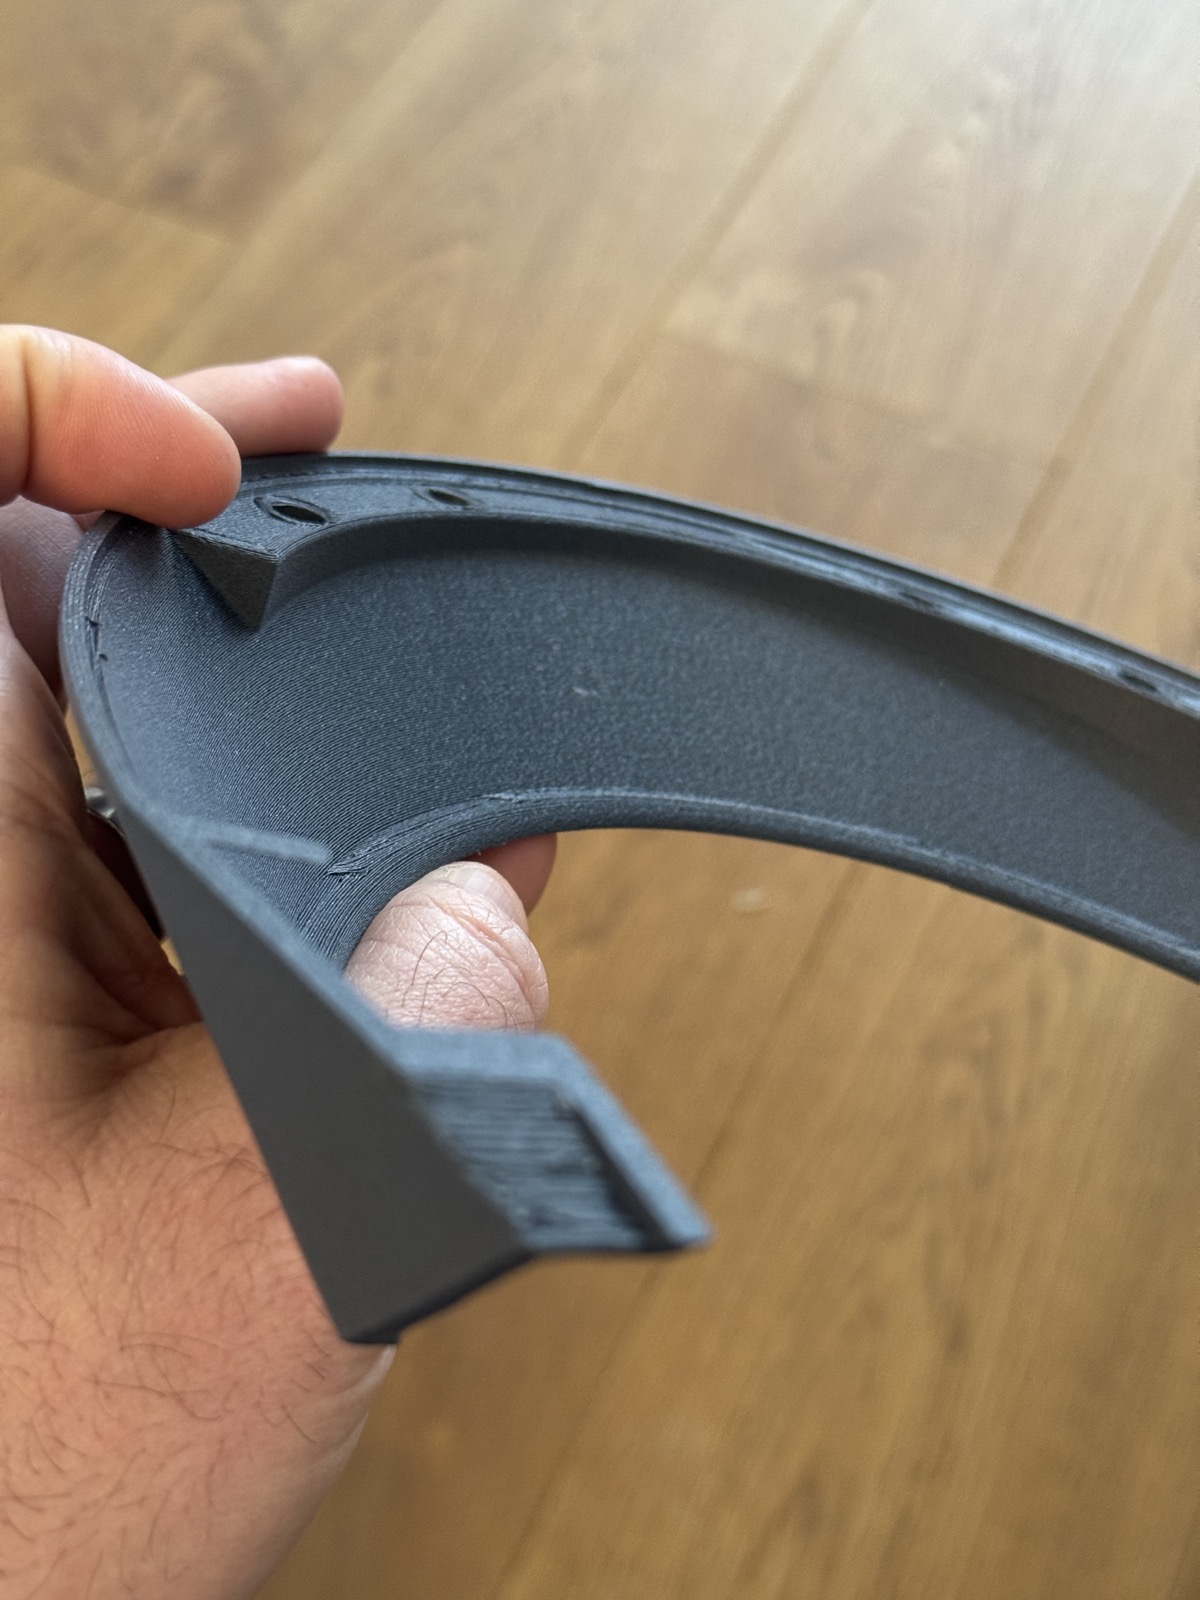
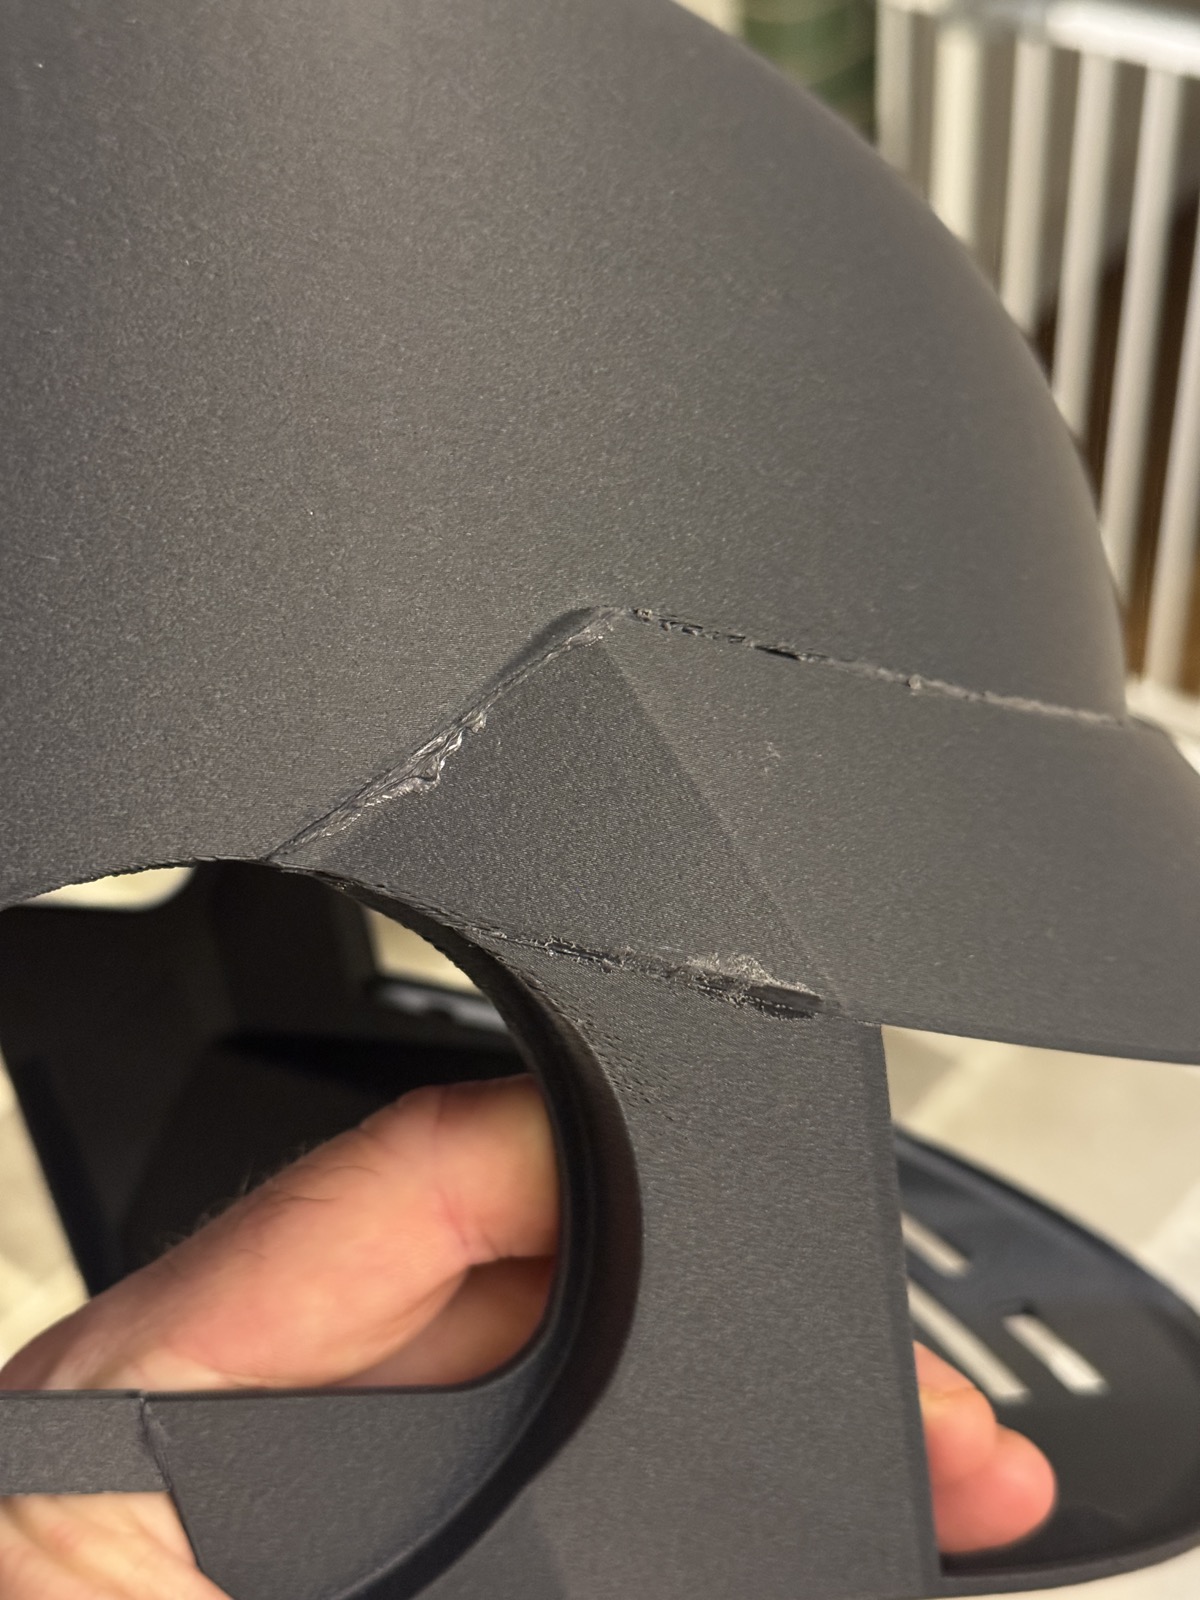
The joints came out strong. The seams are visible at this stage, but that’s what sanding and finishing are for.
The Assembled Shell Link to heading
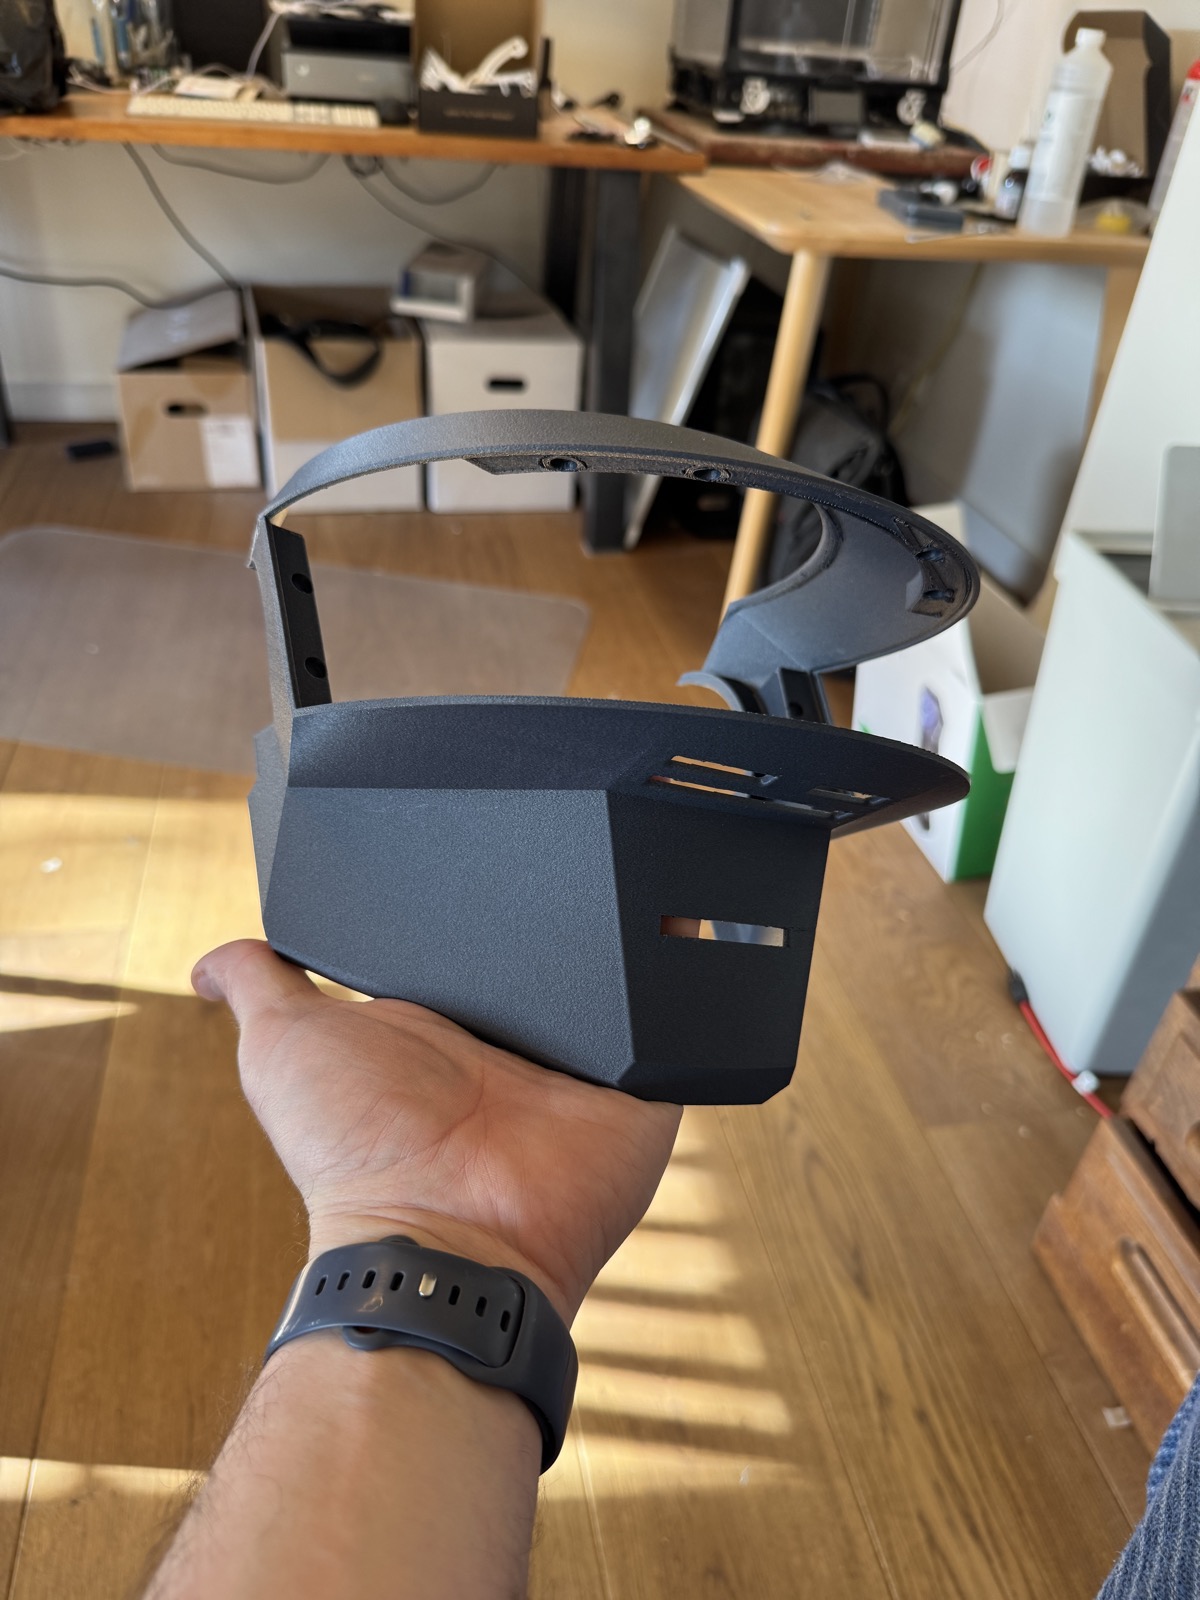
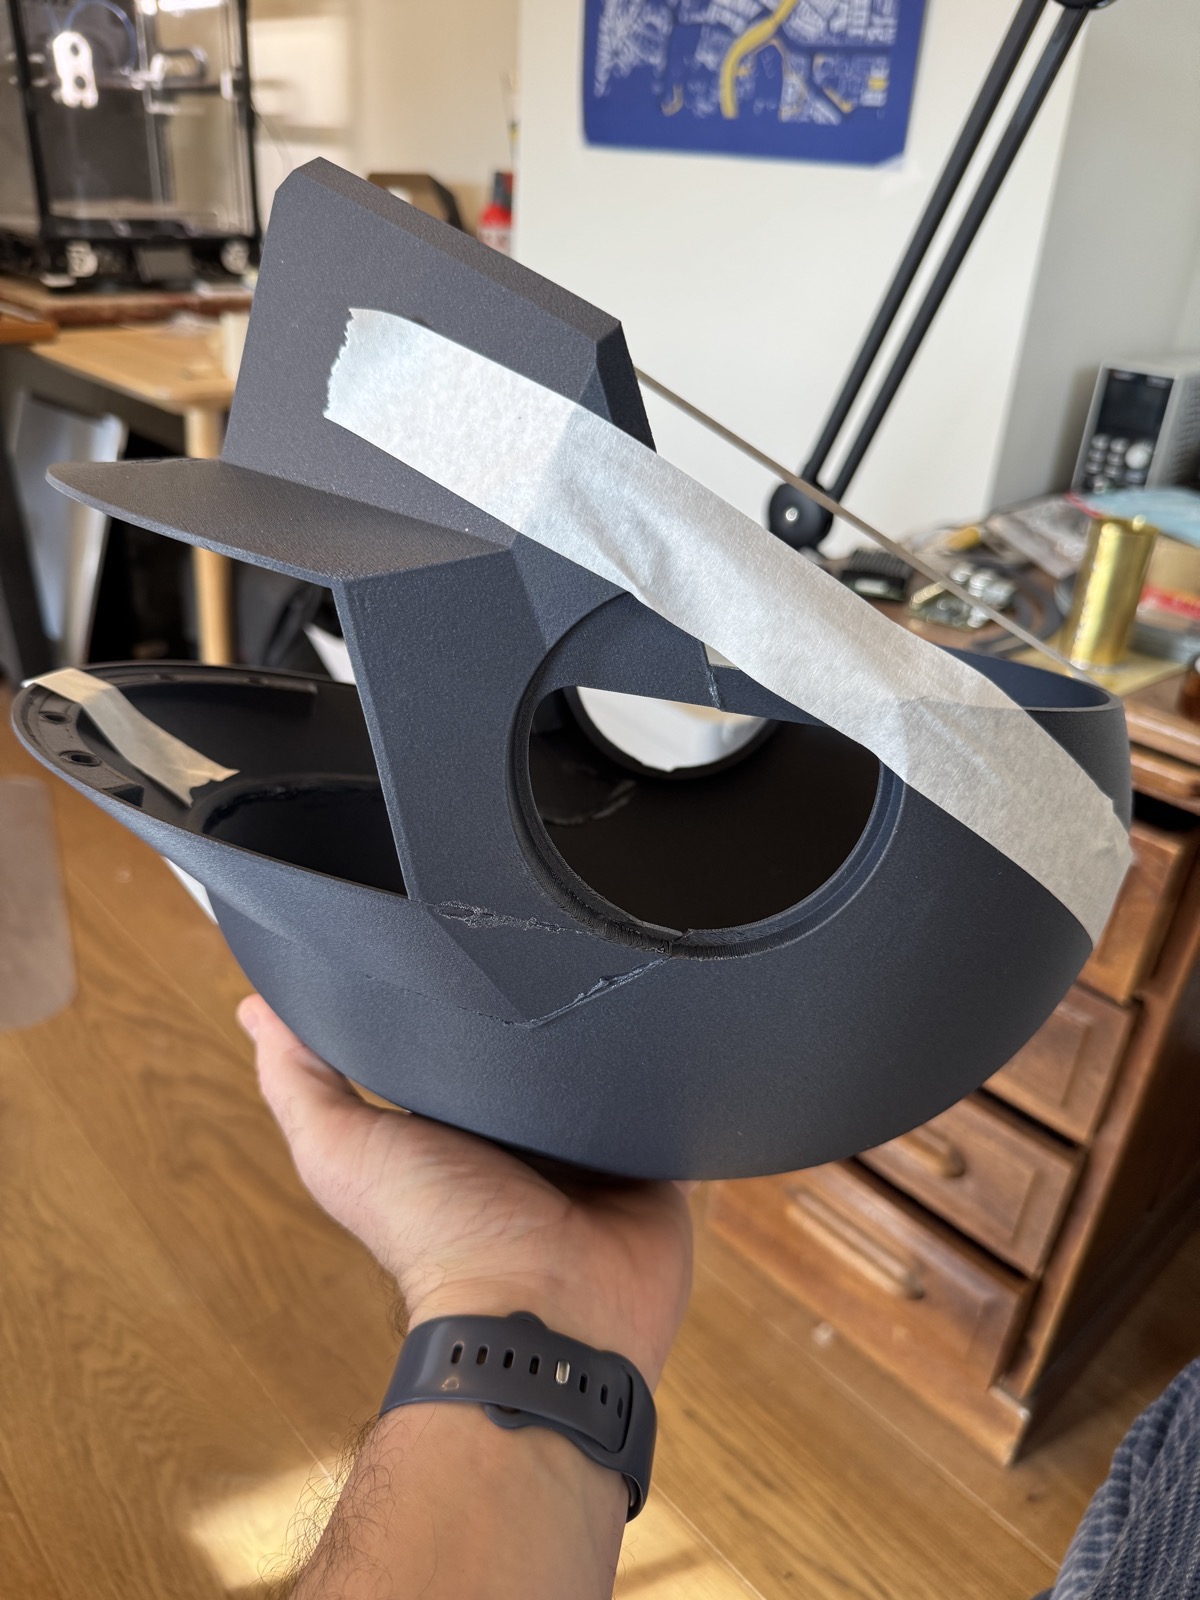
Once everything was bonded and the tape came off, this is what I had.
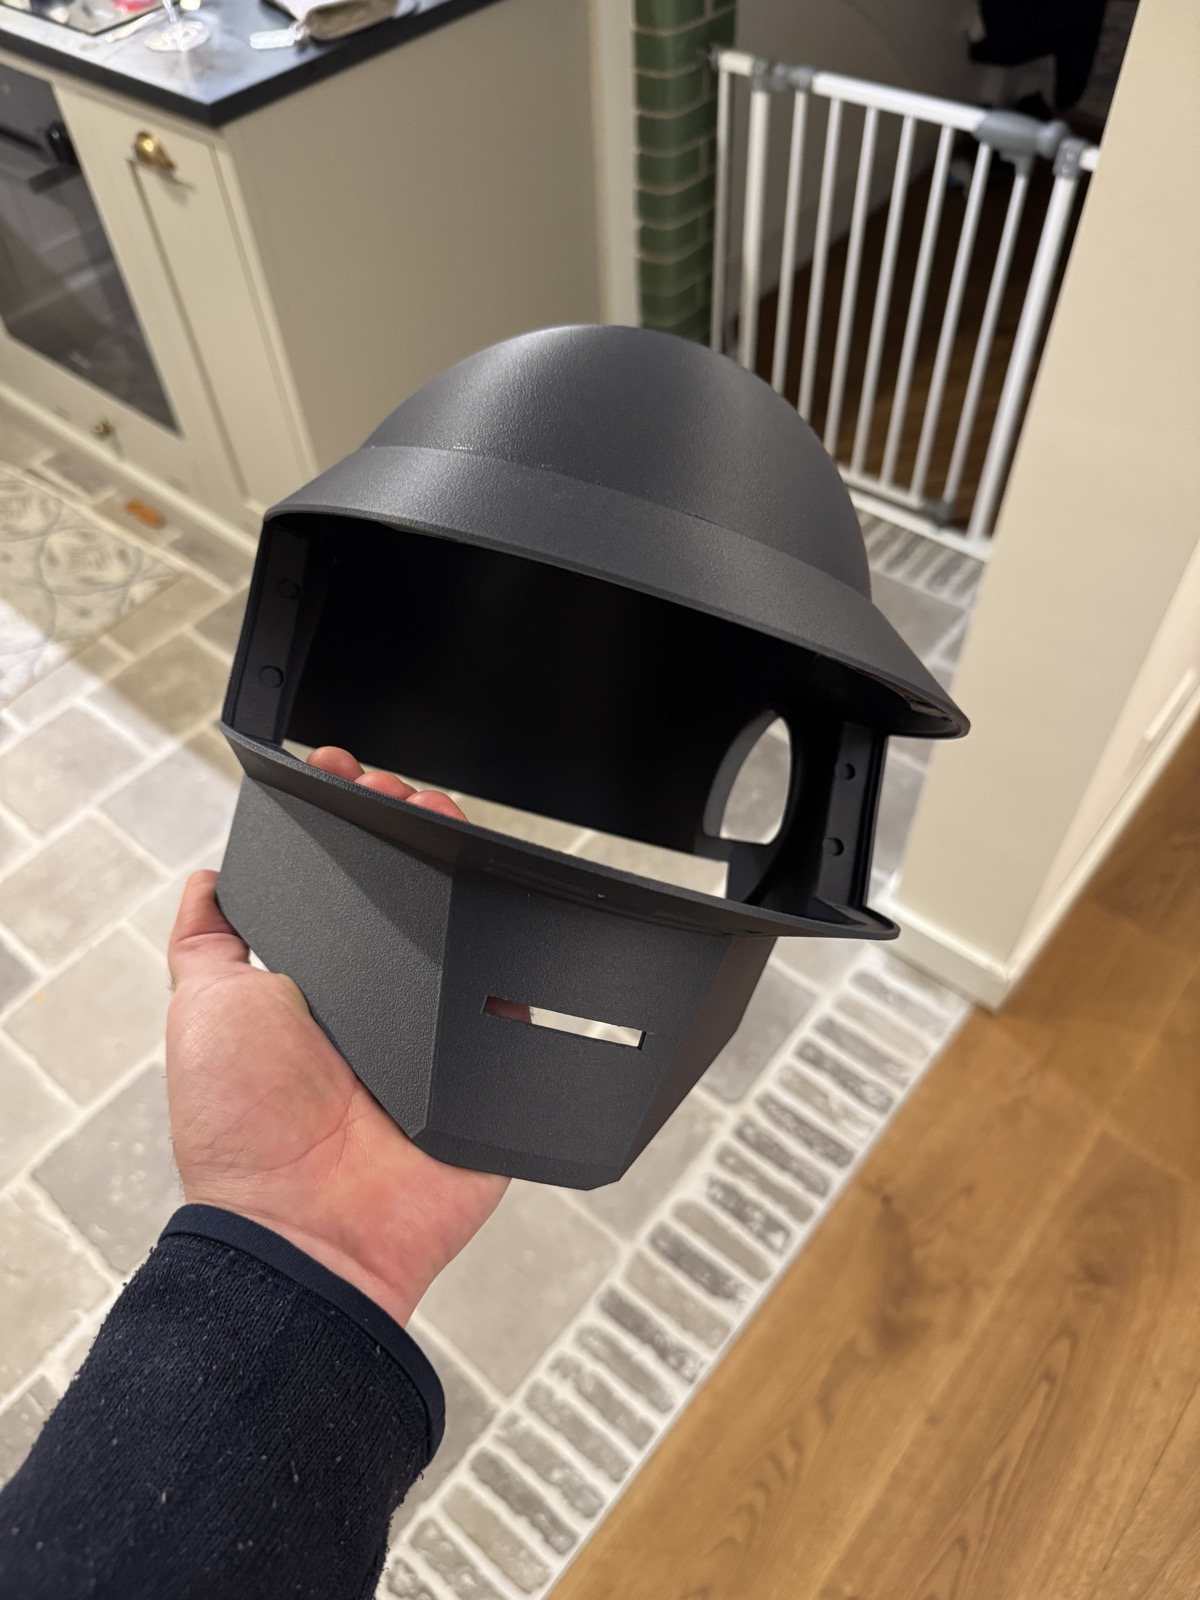

The scale is right for my head. It sits well, the proportions match the reference, and the acetone welds are solid. Close up, the seams are still obvious — the detail shot below shows the work that’s ahead.
What Comes Next Link to heading
This is where things get more experimental.
Sanding Link to heading
The printed surface has layer lines, which need to go. The plan is to sand progressively through grits until the surface is smooth enough to take a finish. On something this size, that’s going to take a while.
Smoothing Link to heading
Once sanded, I’ll either vapor smooth or brush on acetone to knock out any remaining surface texture. ASA responds well to acetone, so I’m hoping this is all I will have to do. The goal is a surface that’s as smooth as I can achieve with sandpaper so that there’s less work to do after the copper is applied.
Electroplating Link to heading
This is the part of the project I’m most uncertain about. I’ve been testing copper electroplating spray paint on smaller components and gotten some promising results, though I still need to nail down the polishing process — getting it to a true mirror finish is harder than it looks.
The bigger challenge is that those small-scale tests don’t really translate to a full helmet. A piece this size needs a larger electroplating bath and substantially larger volumes of copper sulfate chemistry, which is hazardous and not something I want to handle carelessly. I haven’t figured that part out yet.
Once the copper is polished to a shine, the final step will be a palladium plate layer brushed on top to get the silver mirror look. I have the chemistry in mind, but I’m not there yet.
Where Things Stand Link to heading
The shell is printed and assembled. But a lot remains to be done. I will say, though - having a physical object to hold makes this feel a lot more real than it did at the planning stage. I’m at a good stopping point with this while I get the electroncis package assembled. That’ll be what I share next.
This is part 2 of an ongoing build log. Part 1 covers the plan; Part 3 covers the electronics.